Introduction
 I've added this new page to detail the progress of my Electron Sequencer. The sequencer will be used to trigger my SynTomII, SynBal and SynClap modules I completed a few years ago. I have already
built a Raspberry Pi sequencer but since I unpacked my Acorn machines I thought I'd create a sequencer that is of the same time period as that of the SynDrum sound effects.
The hardware setup has been detailed on the Acorn Revival 2019 page but to summarise it'll consist of an Electron with a Plus 1, a E2P second processor, Dual User Ports and a Pegasus Disc
Interface. If I don't bother with a Save/Load function the DIsc Inteface can be removed. Possibly this is a sledgehammer to crack a nut but it'll be an interesting exercise.
There is still one circuit board to make, the SynDrum interface board which will include sixteen channel LED's to help with testing - it's quieter!. Most of the content here will be the progress of
the program, I'll be programing in BASIC/Assembly language for the second processor which I'm very much a novice so it'll be a bit of a learning experience.
I'm going to break down the program into a number of elements so I can concentrate on just one at a time and build up from there. I've started this process by making sure I can read and write data
between the second processor and the User Ports. In time I'll implement the following functionality:
I may even add a short video or two as the sequencer takes shape.
The Interface Board
The interface board simply plugs into the User Port ports using ribbon cable and provides signal buffering and channel/step indications. I am using a 74C244 non-invering buffer but I may change
this to 74C240 inverting buffer depending what data sense works for me in the program.


While waitng for the board to arrive I thought I'd supercede it with an interface board that can be used to trigger my modular synth as well as the Syndrum. As the modular synth uses 12V
for trigger and CV I could re-use my circuit from the Maplin/RPi interface to level shift the voltages from 5V to 12V. This new module is therefore a hybrid of the above and the RPi HAT. I
will also include a CV out as per my other modular synth sequencer.. should be interesting..
Meanwhile I'll complete the build of this first interface while waiting for the new board to arrive... and here is the board under test, this gives me confidence with the new board.


The second Interface board design and layout which will be built as a module and fitted to the Modular Synth Rack.
The Build
Turning my attention to building the sequencer module and the final configuration of the Electron has me thinking what should my minimum Electron setup be? For instance I don't want to
dedicate the Electron Disc Interface and drive to run just one program! There are two configurations I can use, The Electron/Plus1, ATI/Raspberry Pi and User Port or Electron/Plus1, Jafa 2nd Processor,
User Port and ROM Cartridge. Firstly I had to get the program into a ROM and the simplest way to do this is by using a utility that copies the program and wraps it into ROM image
to be called either by star command or Loading/Chaining.
I looked back to a program called 'Prommer' that I had used to make the TV Pattern Generator ROM, the program was published in the June 1987 Micro User magazine, and can be used to put up to 16 programs
into various sizes of ROM image. My program is a little over 8K so I would have to use a 16K image. Unfortunately it proved that Prommer doesn't support loading programs over the Tube interface,
something I need for my program to run on the 2nd proccessor. I also looked at EPRUtils and again it doesn't work over the Tube. Finally I had success the the PRES MakeROM ROM which
works well but with the slight draw back of using the ROM filing system - *ROM then CH."filename". It's not exactly what I wanted but it's the next best thing.
Getting the Electron ready involved dragging out my old Microvitec monitor, another blast from the past! I can see from the picture size on the screen I'd been playing around with the horizontal
and vertical scan at some point so I'll need to re-size that when I get a moment. There's not much space so the monitor will have to sit under the Synth and the Electron on top of the monitor.
The Electron currently has the Rasbperry Pi 2nd processor plugged into the Advanced Tube Interface along with a User Port, I made up two User Ports to save swapping them out all the time. The
E2P is still being used for testing but will be swapped in when I have everything ready.
 The Electron & E2P running the sequencer software.


The Electron being setup under the Synth.


And the final Electron setup with a Slogger Pegasus disc interface & Gotek and a 512K Electron Second Processor with Dual User Port.


The Synth Interface in the 'Paintshop' and the initial assembly.
An aside: I Switched on the Modular Synth yesterday and the Midimuso Interface didn't work which turned out to be a bad solder joint on a capacitor on the crystal circuit. The bad solder joint
came about due to oxidisation on the legs of the capacitor which caused a dry joint (nothing to do with my bad soldering!). Then the perfect storm blew in..I had just set up the Midinuso for a final
test only to watch the Raspberry Pi screen fade to black - that turned out to be an SD card failure so I had to rebuild a new card with OS and the Midi Controller program. Sorted now but
I lost a few hours..


The bare Synth Interface board and part populated mounted on module face plate.

The Synth Interface board under test.


The Module wiring complete, just one knob and labelling to complete it.
The bench testing went well so I then installed it into the Modular Synth rack and that's when it went a bit downhill. For the CV connection to the synth the pulse width was too short for the oscillators
to produce a sound, this was easily sorted by updating the program to produce longer pulses. So now in v1.03 the pulse widths depend on the tempo..I'll need to think carfully and set up the pulse width to
suit both the drum effects and the CV/Triggers for the Synth.
The downhill slope carried on with the interface to the E&MM drum effects. Although the interface works it doesn't take into account an easy change over between the RPi Sequencer and the Electron -
different cabling. So to simply things I've added opto isolaters to the board, the same as the RPi sequencer, and now I'll be able to parallel up the seqencers with no cable changing required.
Luckily there was plenty room on the board to accommodate the extra IC's.


The second interface board design, V1.1, and the layout which is a direct replacement to the earlier board.


The new board with the opto isolators now built, installed and working well. EasyEDA Project Page

![]() The User Port Interface BOM,
Gerbers and Schematic.
The User Port Interface BOM,
Gerbers and Schematic.
The Electron working to the E&MM drum rack and synth via the interface module.
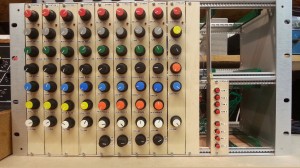
Syntom: The Elk Sequencer will trigger my Syndrum rack, the rack was started back in the '80s and was only completed in 2015 with nine Syn modules. I have described the build on my Projects
and Raspberry Pi pages but as you can see from the picture I can squeeze in a few small 3U modules at the top right. As luck would have it, Julian Ilett - YouTube, has just made a great video
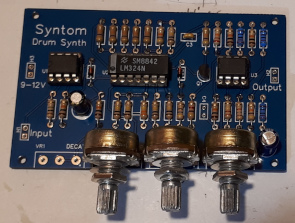
on the making of the E&MM Syntom, this board would make the perfect addition to my rack as it's small enough to fit the space. I just needed to alter a couple things - potentiomenters instead of
presets and some mounting holes but other than that it's the same board. My rack has Syntom II's, Synbal's and Synclaps but not the original Syntom so by using Julians design on EasyEDA I made some
boards which are now almost ready to try. I'll probably build a couple more as I have seven spare channels on the Elk Sequencer.
E2P with User Ports
Using the riser board with the E2P and User Ports together works very well but it does look a bit of a mess so I thought I'd see if I could combine the E2P and User Ports together into one cartridge
then it would make for a very tidy solution. I have done a rough layout and it looks like I can fit both onto a board 3.3"h x 7.2"w, this is bit wider than most cartridges but is keeps it at
a reasonable height.
With some help programming a new PLD for the User Port Logic I managed to get the board much smaller, roughly the same width as a Slogger Pegasus Disc Interface. Below is a photo of the finished board
complete in its case.

The Software
I slowly built up the software functions based on the list above and have listed the program below with some notes to help explain what each section does. Please remember that a second processor
and dual user ports are required.
![]() This disc contains the BASIC file
"SEQ105" and a ROM Image "SEQROM". To use the ROM image do the following - load it into sideways RAM, press CTRL BREAK, type *ROM, type CH."Q28"
This disc contains the BASIC file
"SEQ105" and a ROM Image "SEQROM". To use the ROM image do the following - load it into sideways RAM, press CTRL BREAK, type *ROM, type CH."Q28"
Mode State:
V1.00 - Initial version
V1.01 - Added Step Editor
V1.02 - Added Live Play
V1.03 - 26/06/20 - Changed the way trigger pulses and tempo are handled. The pulse (trigger) and tempo were two different procedures where the pulse width was fixed and tempo variable now this has changed
to one procedure and the pulse width varies with tempo. We'll see how it behaves once it is connected to the drum modules and synthesiser.
V1.04 - 02/07/20 - Program now starts at the menu screen instead of jumping straight to editing, added sound to the line edit selection keys, fixed a bug with the line count in the line editor,
improved the triggering of the live play and a major overhall of the screen layout - made some use of user defined characters to hide the techie numbering of the step data and to make the layout
look better.
v1.05 - 19/07/20 - Re-wrote the keyboard routines for better response and removed the graphics from the Live option as it was seriously slowing down the keyboard response times.
How to use:
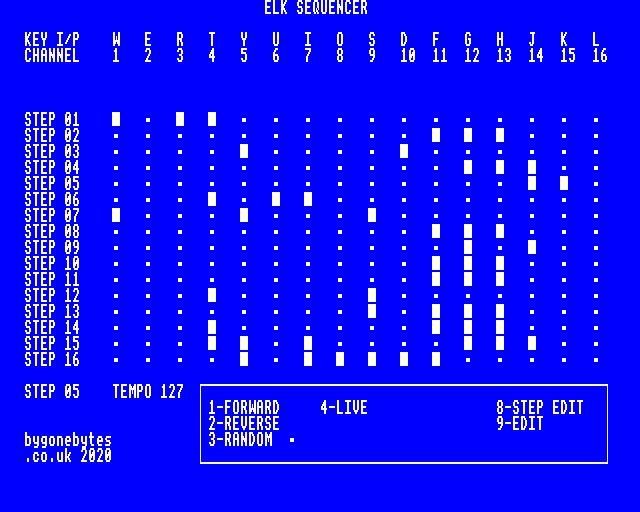
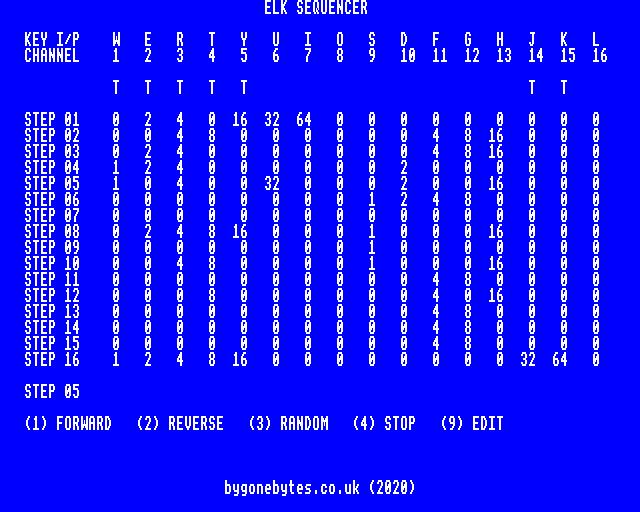
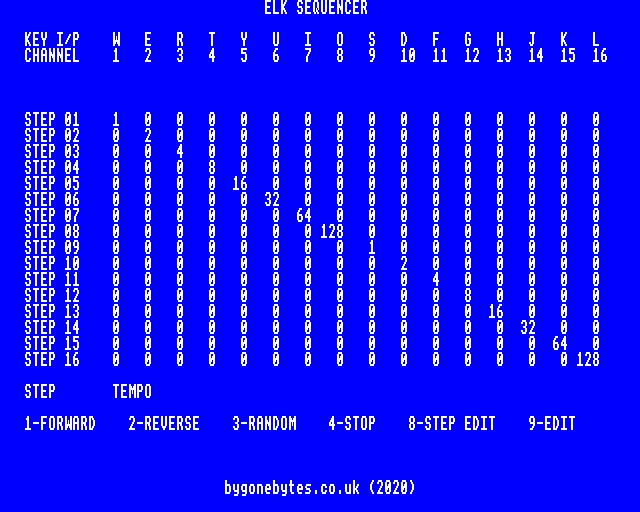
On starting the program you are taken to the opening screen. The following two screens show this and after data has been entered:
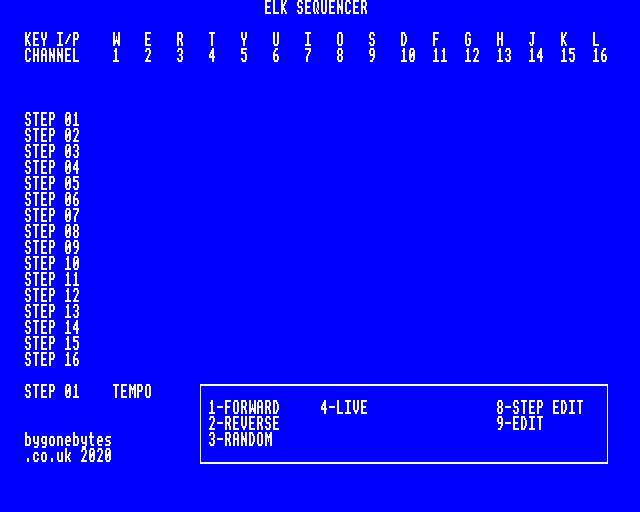
The menu on the bottom right of the screen has the following options:
1-Forward
2-Reverse
3-Random
4-Live
8-Step Edit
9-Edit
On selecting any option a dot will appear beside the chosen option as a reminder what has been selected.
First we have to set up some trigger data, to do this press '9' and use the keys W to O for channels 1 to 8 and S to L for channels 9 to 16. When a key is pressed a 'block character' is displayed below
the corresponding channel number and on pressing ENTER the data is entered onto the STEP 1 row. Continue to do this for all 16 steps and at this point the program will automatically
switch back to the menu. Pressing SPACE at any time will also return you to the menu.
Selecting one of the play options, 1 to 3, will start the sequence, the Step Count and Tempo will be displayed. Turning the tempo potentiometer will vary the play step rate. Pressing SPACE will
stop the sequence ready for another menu selection.
Pressing 4 will let you play live, each key press will immediately trigger the sound effect, again, pressing SPACE will stop live play and let you make another menu selection.
Pressing 8 will select the option to edit from a particular step. Use the UP and DOWN cursor keys to select the Step No., the step count will increase or decrease for each press. A sound will be
heard for each key press and on pressing the Right cursor key trigger data can be entered as before for the selected line. Pressing SPACE will take you out of Step Edit. As an experiment I
added sound to the cursor keys, I'll see if it's useful or just annoying.
10 REM bygonebytes.co.uk (2020) ELK SEQUENCER V1.05
20 IF HIMEM <&8000 THEN 30 ELSE 50
30 PRINT"Switch on your Electron 2nd processor"
40 END
50 DIM Q% 100
60 P%=Q%
70 [OPT 0
Note: Sets how much memory just above LOMEM to reserve for assembling the program. In this case 101 bytes.
80 .init LDA #&93
90 LDX #&B3
100 LDY #&FF
110 JSR &FFF4
120 LDA #&93
130 LDX #&B2
140 LDY #&FF
150 JSR &FFF4
160 RTS
Note: When called this initialises both ports to write out data.
170 .write LDY &6000
180 LDA #&93
190 LDX #&B1
200 JSR &FFF4
210 LDY &6001
220 LDA #&93
230 LDX #&B0
240 JSR &FFF4
250 RTS
Note: When called writes data from memory locations &6000 and &6001 out to the ports - I'll need to look at the Electron memory map to see if I can use a couple of locations below PAGE
so re-allocation won't be required in the future.
260 .zero LDY #&0
270 LDA #&93
280 LDX #&B1
290 JSR &FFF4
300 LDY #&0
310 LDA #&93
320 LDX #&B0
330 JSR &FFF4
340 RTS
350 ]
Note: When called puts all user port outputs to zero.
360 CALL init:CALL zero
Note: Intialise the ports and puts all outputs to zero.
370 MODE 0
380 @%=&00004
390 VDU19,0,4;0;
400 VDU23,1,0;0;0;0;
410VDU23,224,255,255,255,255,255,255,255,0
420VDU23,225,0,0,0,60,60,0,0,0
430VDU23,226,255,128,128,128,128,128,128,128
440VDU23,227,255,1,1,1,1,1,1,1
450VDU23,228,1,1,1,1,1,1,1,255
460VDU23,229,128,128,128,128,128,128,128,255
470VDU23,230,128,128,128,128,128,128,128,128
480VDU23,231,1,1,1,1,1,1,1,1
490VDU23,232,255,0,0,0,0,0,0,0
500VDU23,233,0,0,0,0,0,0,0,255
510E$=CHR$(225):F$=CHR$(224)
520*FX16,1
530*FX4,1
540PROCdeclare
550PROCdeclare1
560PROCscreen
570PROCgo
580END
Note: Sets the screen mode, sets the tabs, switches off the cursor, changes the screen background colour, switches off all analogue channels except channel 1, declares the variables,
sets up user defined characters, draws the screen layout, and goes to the opening screen.
590DEFPROCstep
600IF S>16 S=0
610IF S=1 a1%=K1+K2+K3+K4+K5+K6+K7+K8
620IF S=1 b1%=K9+K10+K11+K12+K13+K14+K15+K16
630IF S=2 a2%=K1+K2+K3+K4+K5+K6+K7+K8
640IF S=2 b2%=K9+K10+K11+K12+K13+K14+K15+K16
650IF S=3 a3%=K1+K2+K3+K4+K5+K6+K7+K8
660IF S=3 b3%=K9+K10+K11+K12+K13+K14+K15+K16
670IF S=4 a4%=K1+K2+K3+K4+K5+K6+K7+K8
680IF S=4 b4%=K9+K10+K11+K12+K13+K14+K15+K16
690IF S=5 a5%=K1+K2+K3+K4+K5+K6+K7+K8
700IF S=5 b5%=K9+K10+K11+K12+K13+K14+K15+K16
710IF S=6 a6%=K1+K2+K3+K4+K5+K6+K7+K8
720IF S=6 b6%=K9+K10+K11+K12+K13+K14+K15+K16
730IF S=7 a7%=K1+K2+K3+K4+K5+K6+K7+K8
740IF S=7 b7%=K9+K10+K11+K12+K13+K14+K15+K16
750IF S=8 a8%=K1+K2+K3+K4+K5+K6+K7+K8
760IF S=8 b8%=K9+K10+K11+K12+K13+K14+K15+K16
770IF S=9 a9%=K1+K2+K3+K4+K5+K6+K7+K8
780IF S=9 b9%=K9+K10+K11+K12+K13+K14+K15+K16
790IF S=10 a10%=K1+K2+K3+K4+K5+K6+K7+K8
800IF S=10 b10%=K9+K10+K11+K12+K13+K14+K15+K16
810IF S=11 a11%=K1+K2+K3+K4+K5+K6+K7+K8
820IF S=11 b11%=K9+K10+K11+K12+K13+K14+K15+K16
830IF S=12 a12%=K1+K2+K3+K4+K5+K6+K7+K8
840IF S=12 b12%=K9+K10+K11+K12+K13+K14+K15+K16
850IF S=13 a13%=K1+K2+K3+K4+K5+K6+K7+K8
860IF S=13 b13%=K9+K10+K11+K12+K13+K14+K15+K16
870IF S=14 a14%=K1+K2+K3+K4+K5+K6+K7+K8
880IF S=14 b14%=K9+K10+K11+K12+K13+K14+K15+K16
890IF S=15 a15%=K1+K2+K3+K4+K5+K6+K7+K8
900IF S=15 b15%=K9+K10+K11+K12+K13+K14+K15+K16
910IF S=16 a16%=K1+K2+K3+K4+K5+K6+K7+K8
920IF S=16 b16%=K9+K10+K11+K12+K13+K14+K15+K16
930IF S=1 PROCconv:PRINTTAB(14,7)D1$,D2$,D3$,D4$,D5$,D6$,D7$,D8$,D9$,D10$,D11$,D12$,D13$,D14$,D15$,D16$
940IF S=1 PRINTTAB(8,24)"02"
950IF S=2 PROCconv:PRINTTAB(14,8)D1$,D2$,D3$,D4$,D5$,D6$,D7$,D8$,D9$,D10$,D11$,D12$,D13$,D14$,D15$,D16$
960IF S=2 PRINTTAB(8,24)"03"
970IF S=3 PROCconv:PRINTTAB(14,9)D1$,D2$,D3$,D4$,D5$,D6$,D7$,D8$,D9$,D10$,D11$,D12$,D13$,D14$,D15$,D16$
980IF S=3 PRINTTAB(8,24)"04"
990IF S=4 PROCconv:PRINTTAB(14,10)D1$,D2$,D3$,D4$,D5$,D6$,D7$,D8$,D9$,D10$,D11$,D12$,D13$,D14$,D15$,D16$
1000IF S=4 PRINTTAB(8,24)"05"
1010IF S=5 PROCconv:PRINTTAB(14,11)D1$,D2$,D3$,D4$,D5$,D6$,D7$,D8$,D9$,D10$,D11$,D12$,D13$,D14$,D15$,D16$
1020IF S=5 PRINTTAB(8,24)"06"
1030IF S=6 PROCconv:PRINTTAB(14,12)D1$,D2$,D3$,D4$,D5$,D6$,D7$,D8$,D9$,D10$,D11$,D12$,D13$,D14$,D15$,D16$
1040IF S=6 PRINTTAB(8,24)"07"
1050IF S=7 PROCconv:PRINTTAB(14,13)D1$,D2$,D3$,D4$,D5$,D6$,D7$,D8$,D9$,D10$,D11$,D12$,D13$,D14$,D15$,D16$
1060IF S=7 PRINTTAB(8,24)"08"
1070IF S=8 PROCconv:PRINTTAB(14,14)D1$,D2$,D3$,D4$,D5$,D6$,D7$,D8$,D9$,D10$,D11$,D12$,D13$,D14$,D15$,D16$
1080IF S=8 PRINTTAB(8,24)"09"
1090IF S=9 PROCconv:PRINTTAB(14,15)D1$,D2$,D3$,D4$,D5$,D6$,D7$,D8$,D9$,D10$,D11$,D12$,D13$,D14$,D15$,D16$
1100IF S=9 PRINTTAB(8,24)"10"
1110IF S=10 PROCconv:PRINTTAB(14,16)D1$,D2$,D3$,D4$,D5$,D6$,D7$,D8$,D9$,D10$,D11$,D12$,D13$,D14$,D15$,D16$
1120IF S=10 PRINTTAB(8,24)"11"
1130IF S=11 PROCconv:PRINTTAB(14,17)D1$,D2$,D3$,D4$,D5$,D6$,D7$,D8$,D9$,D10$,D11$,D12$,D13$,D14$,D15$,D16$
1140IF S=11 PRINTTAB(8,24)"12"
1150IF S=12 PROCconv:PRINTTAB(14,18)D1$,D2$,D3$,D4$,D5$,D6$,D7$,D8$,D9$,D10$,D11$,D12$,D13$,D14$,D15$,D16$
1160IF S=12 PRINTTAB(8,24)"13"
1170IF S=13 PROCconv:PRINTTAB(14,19)D1$,D2$,D3$,D4$,D5$,D6$,D7$,D8$,D9$,D10$,D11$,D12$,D13$,D14$,D15$,D16$
1180IF S=13 PRINTTAB(8,24)"14"
1190IF S=14 PROCconv:PRINTTAB(14,20)D1$,D2$,D3$,D4$,D5$,D6$,D7$,D8$,D9$,D10$,D11$,D12$,D13$,D14$,D15$,D16$
1200IF S=14 PRINTTAB(8,24)"15"
1210IF S=15 PROCconv:PRINTTAB(14,21)D1$,D2$,D3$,D4$,D5$,D6$,D7$,D8$,D9$,D10$,D11$,D12$,D13$,D14$,D15$,D16$
1220IF S=15 PRINTTAB(8,24)"16"
1230IF S=16 PROCconv:PRINTTAB(14,22)D1$,D2$,D3$,D4$,D5$,D6$,D7$,D8$,D9$,D10$,D11$,D12$,D13$,D14$,D15$,D16$
1240IF S=16 PRINTTAB(8,24)" "
1250IF S=16 FOR L=14 TO 75:PRINTTAB(L,5)" ":NEXT
1260IF S=16 PROCgo
1270ENDPROC
1280DEFPROCkeys
1290*FX21,0
1291PROCdeclare
1300FOR L=14 TO 75:PRINTTAB(L,5)" ":NEXT
1310A=GET
1320ON (A-67) GOSUB 1440,1360,1450,1460,1470,1410,1480,1490,1500,5100,5100,1420,5100,5100,1370,1430,1380,1400,5100,1350,5100,1390 ELSE 1330
1330ON (A-31) GOTO 1540 ELSE 1340
1340ON (A-12) GOTO 1510 ELSE 1310
1350K1=1:PRINTTAB(14,5)F$:RETURN
1360K2=2:PRINTTAB(18,5)F$:RETURN
1370K3=4:PRINTTAB(22,5)F$:RETURN
1380K4=8:PRINTTAB(26,5)F$:RETURN
1390K5=16:PRINTTAB(30,5)F$:RETURN
1400K6=32:PRINTTAB(34,5)F$:RETURN
1410K7=64:PRINTTAB(38,5)F$:RETURN
1420K8=128:PRINTTAB(42,5)F$:RETURN
1430K9=1:PRINTTAB(46,5)F$:RETURN
1440K10=2:PRINTTAB(50,5)F$:RETURN
1450K11=4:PRINTTAB(54,5)F$:RETURN
1460K12=8:PRINTTAB(58,5)F$:RETURN
1470K13=16:PRINTTAB(62,5)F$:RETURN
1480K14=32:PRINTTAB(66,5)F$:RETURN
1490K15=64:PRINTTAB(70,5)F$:RETURN
1500K16=128:PRINTTAB(74,5)F$:RETURN
1510PROCstep:S=S+1:PROCdeclare:FOR L=14 TO 75:PRINTTAB(L,5)" ":NEXT:GOTO 1310
1520ENDPROC
Note: Data input - scans the keyboard, single steps through each step, each key press is indicated by a 'Block' below the channel number and stores the value for each key press.
Press the SPACE bar at any time to come out of Editing mode.
1530DEFPROCgo
1540FOR L=25 TO 27:PRINTTAB(36,L)" ":NEXT
1550PRINTTAB(74,26)" ":PRINTTAB(47,25)" ":PRINTTAB(74,25)" "
1560IF INKEY(-49) PRINTTAB(36,25)E$:PROCforward
1570IF INKEY(-50) PRINTTAB(36,26)E$:PROCback
1580IF INKEY(-18) PRINTTAB(36,27)E$:PROCrandom
1590IF INKEY(-22) PRINTTAB(74,25)E$:PROCline
1600IF INKEY(-19) PRINTTAB(47,25)E$:PROClive
1610IF INKEY(-39) S=1:PRINTTAB(74,26)E$:PROCkeys
1620GOTO 1560
1630ENDPROC
Note: Start sequence or Editing.
1640 DEFPROCforward
1650 PROCst1:PROCst2:PROCst3:PROCst4:PROCst5:PROCst6:PROCst7:
PROCst8:PROCst9:PROCst10:PROCst11:PROCst12:PROCst13:PROCst14:
PROCst15:PROCst16
1660 GOTO 1650
1670 ENDPROC
1680 DEFPROCback
1690 PROCst16:PROCst15:PROCst14:PROCst13:PROCst12:PROCst11:
PROCst10:PROCst9:PROCst8:PROCst7:PROCst6:PROCst5:PROCst4:
PROCst3:PROCst2:PROCst1
1700 GOTO 1690
1710 ENDPROC
1720 DEFPROCrandom
1730 X=RND(16)
1740 IF X=1 PROCst1
1750 IF X=2 PROCst2
1760 IF X=3 PROCst3
1770 IF X=4 PROCst4
1780 IF X=5 PROCst5
1790 IF X=6 PROCst6
1800 IF X=7 PROCst7
1810 IF X=8 PROCst8
1820 IF X=9 PROCst9
1830 IF X=10 PROCst10
1840 IF X=11 PROCst11
1850 IF X=12 PROCst12
1860 IF X=13 PROCst13
1870 IF X=14 PROCst14
1880 IF X=15 PROCst15
1890 IF X=16 PROCst16
1900 GOTO 1730
1910 ENDPROC
Note: Forward, Reverse and Random sequences.
1920DEFPROCline
1930PRINTTAB(8,24)" "
1940SOUND 1,-15,100,1:S=0
1960ON (A-136) GOSUB 1980,4990,4920 ELSE 1970
1970ON (A-98) GOTO 2010 ELSE 1950
1980SOUND 1,-15,148,1
1990PROCkeys
2000RETURN
2010PROCgo
2020ENDPROC
Note: Select and Edit a Line.
2030DEFPROCst1
2040?&6000=a1%
2050?&6001=b1%
2060PRINTTAB(8,24)"01"
2070PROCtempo
2080IF INKEY(-99) PROCgo
2090ENDPROC
2100DEFPROCst2
2110?&6000=a2%
2120?&6001=b2%
2130PRINTTAB(8,24)"02"
2140PROCtempo
2150IF INKEY(-99) PROCgo
2160ENDPROC
2170DEFPROCst3
2180?&6000=a3%
2190?&6001=b3%
2200PRINTTAB(8,24)"03"
2210PROCtempo
2220IF INKEY(-99) PROCgo
2230ENDPROC
2240DEFPROCst4
2250?&6000=a4%
2260?&6001=b4%
2270PRINTTAB(8,24)"04"
2280PROCtempo
2290IF INKEY(-99) PROCgo
2300ENDPROC
2310DEFPROCst5
2320?&6000=a5%
2330?&6001=b5%
2340PRINTTAB(8,24)"05"
2350PROCtempo
2360IF INKEY(-99) PROCgo
2370ENDPROC
2380DEFPROCst6
2390?&6000=a6%
2400?&6001=b6%
2410PRINTTAB(8,24)"06"
2420PROCtempo
2430IF INKEY(-99) PROCgo
2440ENDPROC
2450DEFPROCst7
2460?&6000=a7%
2470?&6001=b7%
2480PRINTTAB(8,24)"07"
2490PROCtempo
2500IF INKEY(-99) PROCgo
2510ENDPROC
2520DEFPROCst8
2530?&6000=a8%
2540?&6001=b8%
2550PRINTTAB(8,24)"08"
2560PROCtempo
2570IF INKEY(-99) PROCgo
2580ENDPROC
2590DEFPROCst9
2600?&6000=a9%
2610?&6001=b9%
2620PRINTTAB(8,24)"09"
2630PROCtempo
2640IF INKEY(-99) PROCgo
2650ENDPROC
2660DEFPROCst10
2670?&6000=a10%
2680?&6001=b10%
2690PRINTTAB(8,24)"10"
2700PROCtempo
2710IF INKEY(-99) PROCgo
2720ENDPROC
2730DEFPROCst11
2740?&6000=a11%
2750?&6001=b11%
2760PRINTTAB(8,24)"11"
2770PROCtempo
2780IF INKEY(-99) PROCgo
2790ENDPROC
2800DEFPROCst12
2810?&6000=a12%
2820?&6001=b12%
2830PRINTTAB(8,24)"12"
2840PROCtempo
2850IF INKEY(-99) PROCgo
2860ENDPROC
2870DEFPROCst13
2880?&6000=a13%
2890?&6001=b13%
2900PRINTTAB(8,24)"13"
2910PROCtempo
2920IF INKEY(-99) PROCgo
2930ENDPROC
2940DEFPROCst14
2950?&6000=a14%
2960?&6001=b14%
2970PRINTTAB(8,24)"14"
2980PROCtempo
2990IF INKEY(-99) PROCgo
3000ENDPROC
3010DEFPROCst15
3020?&6000=a15%
3030?&6001=b15%
3040PRINTTAB(8,24)"15"
3050PROCtempo
3060IF INKEY(-99) PROCgo
3070ENDPROC
3080DEFPROCst16
3090?&6000=a16%
3100?&6001=b16%
3110PRINTTAB(8,24)"16"
3120PROCtempo
3130IF INKEY(-99) PROCgo
3140ENDPROC
Note: 16 Step Trigger sequence
3150 DEFPROCtempo
3160 TEMP=ADVAL(1)
3170 IF TEMP=0 THEN TEMP=256
3180 PRINTTAB(19,24) TEMP DIV 256
3190 CALLwrite
3200 NOW%=TIME:REPEAT UNTIL TIME=NOW%+TEMP DIV 256
3210 CALLzero
3220 NOW%=TIME:REPEAT UNTIL TIME=NOW%+TEMP DIV 256
3230 ENDPROC
Note: This sets the tempo. The tempo is set with a potentiometer on analogue channel 0 (1).
3240 DEFPROCdeclare
3250 K1=0:K2=0:K3=0:K4=0:K5=0:K6=0:K7=0:K8=0
3260 K9=0:K10=0:K11=0:K12=0:K13=0:K14=0:K15=0:K16=0
3270 ENDPROC
3280 DEFPROCdeclare1
3290 a1%=0:b1%=0:a2%=0:b2%=0:a3%=0:b3%=0:a4%=0:b4%=0:a5%=0:
b5%=0:a6%=0:b6%=0:a7%=0:b7%=0:a8%=0:b8%=0
3300 a9%=0:b9%=0:a10%=0:b10%=0:a11%=0:b11%=0:a12%=0:
b12%=0:a13%=0:b13%=0:a14%=0:b14%=0:a15%=0:b15%=0:a16%=0:b16%=0
3310 S=0
3320 ENDPROC
Note: Declares the variables and sets them to 0.
3330 DEFPROCscreen
3340 PRINTTAB(33,0) "ELK SEQUENCER"
3350 PRINTTAB(14,2) "W","E","R","T","Y","U","I","O","S","D","F","G","H","J","K","L"
3360 PRINTTAB(14,3) "1","2","3","4","5","6","7","8","9","10","11","12","13","14","15","16"
3370 PRINTTAB(3,2) "KEY I/P"
3380 PRINTTAB(3,3) "CHANNEL"
3390 PRINTTAB(3,5) "STEP 01"
3400 PRINTTAB(3,6) "STEP 02"
3410 PRINTTAB(3,7) "STEP 03"
3420 PRINTTAB(3,8) "STEP 04"
3430 PRINTTAB(3,9) "STEP 05"
3440 PRINTTAB(3,10) "STEP 06"
3450 PRINTTAB(3,11) "STEP 07"
3460 PRINTTAB(3,12) "STEP 08"
3470 PRINTTAB(3,13) "STEP 09"
3480 PRINTTAB(3,14) "STEP 10"
3490 PRINTTAB(3,15) "STEP 11"
3500 PRINTTAB(3,16) "STEP 12"
3510 PRINTTAB(3,17) "STEP 13"
3520 PRINTTAB(3,18) "STEP 14"
3530 PRINTTAB(3,19) "STEP 15"
3540 PRINTTAB(3,20) "STEP 16"
3550 PRINTTAB(3,24)"STEP 01"
3560PRINTTAB(25,24)CHR$(226)
3570FOR L=26 TO 74:PRINTTAB(L,24)CHR$(232):NEXT
3580PRINTTAB(75,24)CHR$(227)
3590PRINTTAB(25,25)CHR$(230)
3600PRINTTAB(75,25)CHR$(231)
3610PRINTTAB(25,26)CHR$(230)
3620PRINTTAB(75,26)CHR$(231)
3630PRINTTAB(25,27)CHR$(230)
3640PRINTTAB(75,27)CHR$(231)
3650PRINTTAB(25,28)CHR$(229)
3660FOR L=26 TO 74:PRINTTAB(L,28)CHR$(233):NEXT
3670PRINTTAB(75,28)CHR$(228)
3680PRINTTAB(26,25)"1-FORWARD"
3690PRINTTAB(26,26)"2-REVERSE"
3700PRINTTAB(26,27)"3-RANDOM"
3710PRINTTAB(40,25)"4-LIVE"
3720PRINTTAB(62,25)"8-STEP EDIT"
3730PRINTTAB(62,26)"9-EDIT"
3740PRINTTAB(14,24)"TEMPO"
3750PRINTTAB(3,27)"bygonebytes":PRINTTAB(3,28)".co.uk 2020"
3760ENDPROC
Note: Draws the basic screen layout.
3770 DEFPROClive
3780 IF INKEY(-34) PROCch1
3790 IF INKEY(-35) PROCch2
3800 IF INKEY(-52) PROCch3
3810 IF INKEY(-36) PROCch4
3820 IF INKEY(-69) PROCch5
3830 IF INKEY(-54) PROCch6
3840 IF INKEY(-38) PROCch7
3850 IF INKEY(-55) PROCch8
3860 IF INKEY(-82) PROCch9
3870 IF INKEY(-51) PROCch10
3880 IF INKEY(-68) PROCch11
3890 IF INKEY(-84) PROCch12
3900 IF INKEY(-85) PROCch13
3910 IF INKEY(-70) PROCch14
3920 IF INKEY(-71) PROCch15
3930 IF INKEY(-87) PROCch16
3940 IF INKEY(-99) PROCgo
3950 GOTO 3780
3960 ENDPROC
3970DEFPROCch1
3980a1%=1
3990PROCsnda
4000ENDPROC
4010DEFPROCch2
4020a1%=2
4030PROCsnda
4040ENDPROC
4050DEFPROCch3
4060a1%=4
4070PROCsnda
4080ENDPROC
4090DEFPROCch4
4100a1%=8
4110PROCsnda
4120ENDPROC
4130DEFPROCch5
4140a1%=16
4150PROCsnda
4160ENDPROC
4170DEFPROCch6
4180a1%=32
4190PROCsnda
4200ENDPROC
4210DEFPROCch7
4220a1%=64
4230PROCsnda
4240ENDPROC
4250DEFPROCch8
4260a1%=128
4270PROCsnda
4280ENDPROC
4290DEFPROCch9
4300b1%=1
4310PROCsndb
4320ENDPROC
4330DEFPROCch10
4340b1%=2
4350PROCsndb
4360ENDPROC
4370DEFPROCch11
4380b1%=4
4390PROCsndb
4400ENDPROC
4410DEFPROCch12
4420b1%=8
4430PROCsndb
4440ENDPROC
4450DEFPROCch13
4460b1%=16
4470PROCsndb
4480ENDPROC
4490DEFPROCch14
4500b1%=32
4510PROCsndb
4520ENDPROC
4530DEFPROCch15
4540b1%=64
4550PROCsndb
4560ENDPROC
4570DEFPROCch16
4580b1%=128
4590PROCsndb
4600ENDPROC
4610DEFPROCsnda
4620b1%=0
4630?&6000=a1%
4640?&6001=b1%
4650PROCtrig
4660ENDPROC
4670DEFPROCsndb
4680a1%=0
4690?&6000=a1%
4700?&6001=b1%
4710PROCtrig
4720ENDPROC
Note: Detects a channel key press and outputs a trigger pulse.
4730DEFPROCconv
4740IF K1>0 D1$=F$ ELSE D1$=E$
4750IF K2>0 D2$=F$ ELSE D2$=E$
4760IF K3>0 D3$=F$ ELSE D3$=E$
4770IF K4>0 D4$=F$ ELSE D4$=E$
4780IF K5>0 D5$=F$ ELSE D5$=E$
4790IF K6>0 D6$=F$ ELSE D6$=E$
4800IF K7>0 D7$=F$ ELSE D7$=E$
4810IF K8>0 D8$=F$ ELSE D8$=E$
4820IF K9>0 D9$=F$ ELSE D9$=E$
4830IF K10>0 D10$=F$ ELSE D10$=E$
4840IF K11>0 D11$=F$ ELSE D11$=E$
4850IF K12>0 D12$=F$ ELSE D12$=E$
4860IF K13>0 D13$=F$ ELSE D13$=E$
4870IF K14>0 D14$=F$ ELSE D14$=E$
4880IF K15>0 D15$=F$ ELSE D15$=E$
4890IF K16>0 D16$=F$ ELSE D16$=E$
4900ENDPROC
4910REM DEFPROCup
4920SOUND 1,-15,100,1
4930S=S+1
4940IF S>=16 S=16
4950IF S<=9 PRINTTAB(7,24)" 0";S
4960IF S>9 PRINTTAB(7,24)" ";S
4970RETURN
4980REM DEFPROCdn
4990SOUND 1,-15,100,1
5000S=S-1
5010IF S<=1 S=1
5020IF S<=9 PRINTTAB(7,24)" 0";S
5030IF S>9 PRINTTAB(7,24)" ";S
5040RETURN
5050DEFPROCtrig
5060CALLwrite
5070NOW=TIME:REPEAT UNTIL TIME-NOW>10
5080CALLzero
5090ENDPROC
5100RETURN
Note: Procedures to convert trigger data numbers to User
Defined Characters. Step Edit UP/Down procedures and Live Play Trigger pulse.
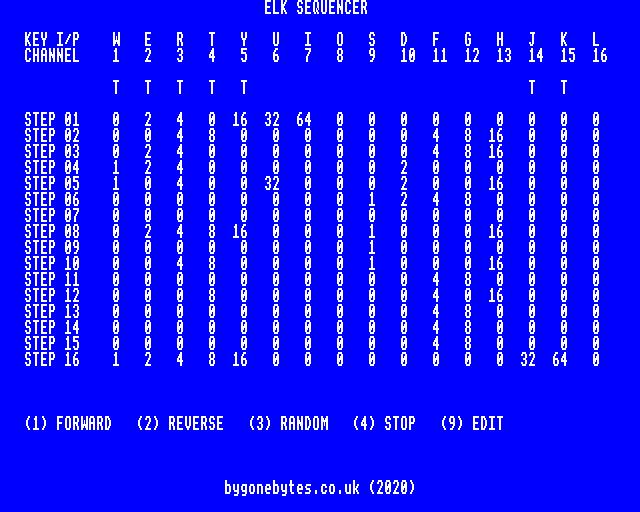
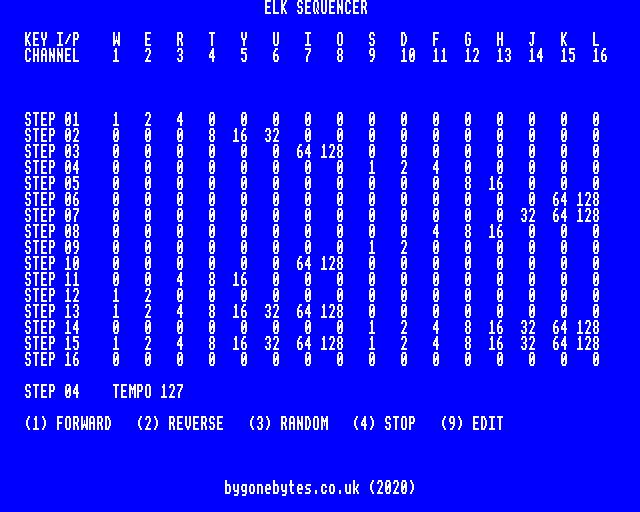
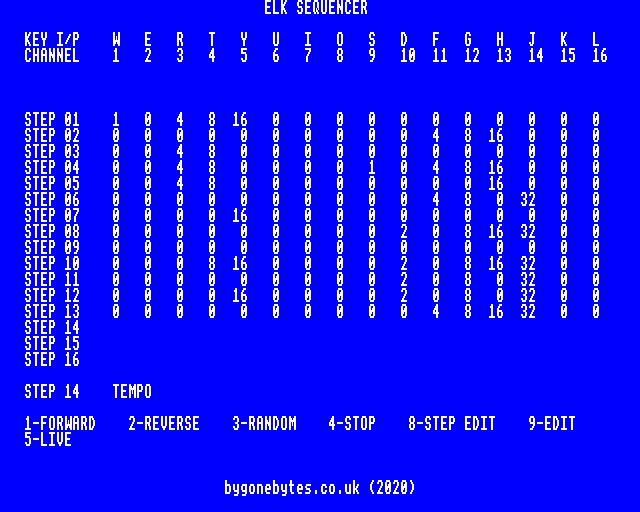
Screen dumps showing how the layout developed.
